My immersion-cooled Oil PC
…one year later
— 9 minTLDR: scroll down for pictures and a video :-)
It was actually quite some time ago when I stumbled upon the concepts of immersion cooling, by which you immerse your whole hardware in a di-electric cooling fluid, and by phase-change cooling, which means that the coolant actually evaporates on the hot parts to carry away the heat, and then condenses again to build a cycle. Go ahead and search the internet/youtube for the keywords novec cooling, you will be amazed! So was I! There is just this sense of peace and calm when you see bubbles rising from your PC components.
I wanted to have something like that myself. So I put in a bit of research.
There are a few specifically engineered fluids, which are di-electric (insulators)
and have a quite low boiling point. The 3M Novec line of fluids are an example.
One of them has a boiling point of 30°C, which in theory means that your
hardware components will rarely exceed those temps.
But there are a few problems:
- With global warming, and without an AC, I get incredibly hot summers, sometimes up to 35°C in my room, which is absolutely no pleasure, believe me! But this means that I simply can’t realistically cool the fluid down below its boiling point in summer with conventional means.
- You simply can’t buy
3M Novecas a private person. It’s just not possible. - Even if it was, I read that it is prohibitively expensive, well above the 100€/l point apparently.
- Novec is very volatile / fleeting (sorry, I don’t really know the correct word), which means you would have to a very air-tight and possibly pressurized container for it.
So considering all this, phase-change cooling was out of the picture. But immersion cooling was still an option. And there is quite some prior art on just using oil for that, which is a di-electric, and has quite good thermal properties as well.
But information on how to properly do it was quite scarce. Do I actually need a
heatsink? (With Novec, you don’t really) How about fans? How large? How to cool
the oil? When using standard water-cooling equipment, how large should that be?
BTW, I am still missing a comprehensive overview of the actually performance
of water-cooling hardware. Like how many Watts of heat can a 2 * 140mm x 45mm
radiator dissipate, when combined with Fans that have an Airflow of X. I
haven’t really found any info on that one! Also, what kind of pump do you need
for a combination of radiators, etc… Info such as this is really scarce to
non-existent on the web. I really wish such info was more widespread. Also,
oil is a lot more viscous than water, so that has to be taken into account as
well.
# Build Timeline
… Anyway, I just made a best guess on the components and started planning.
My first idea was to have the Motherboard and the GPU back-to-back, such as in the DAN A4.
I actually bought the hardware itself about a year ago, together with a PCI-E riser card to try different configurations. Turns out that a faulty riser card can actually randomly crash your games! It was either faulty, or I just bent it too much, but hey! Those cards are supposed to be bent, so they better handle the stress! Anyway, I got a refund for the faulty riser and went with a different one.
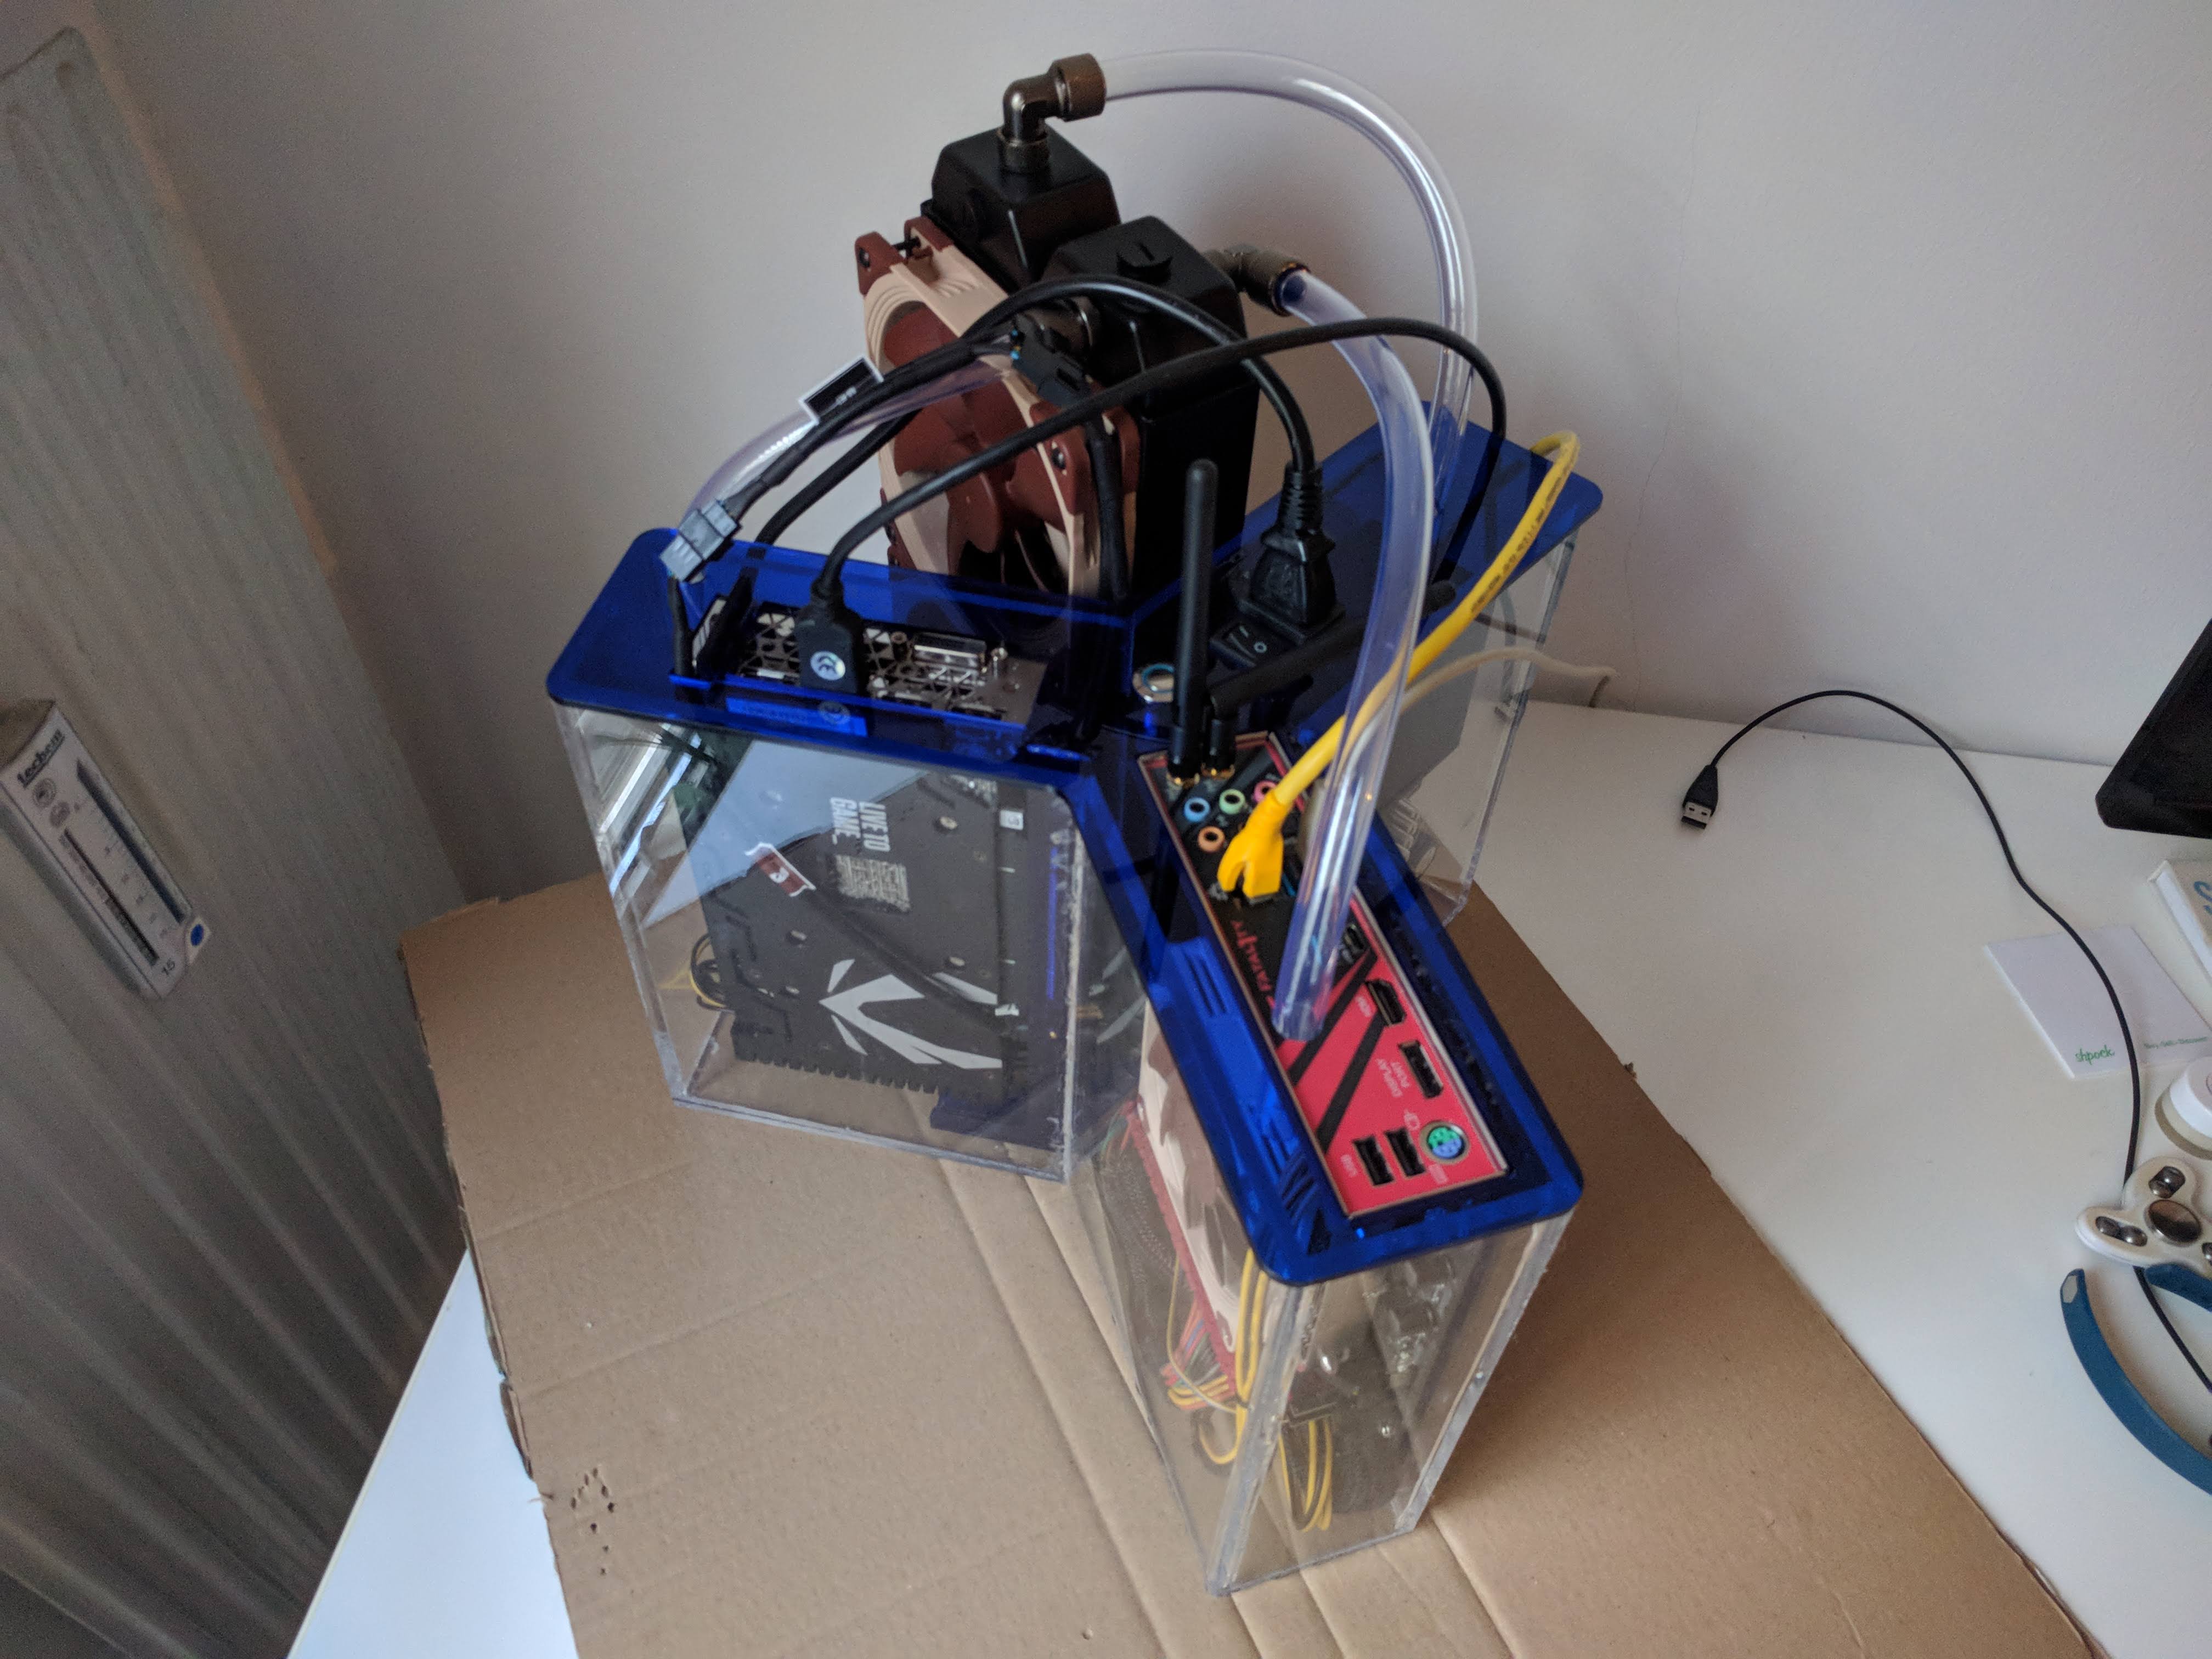
Along the way, I also had the epiphany to do some kind of triangle or star shape. And thus, also the projects code-name was born: Trinity-Force.
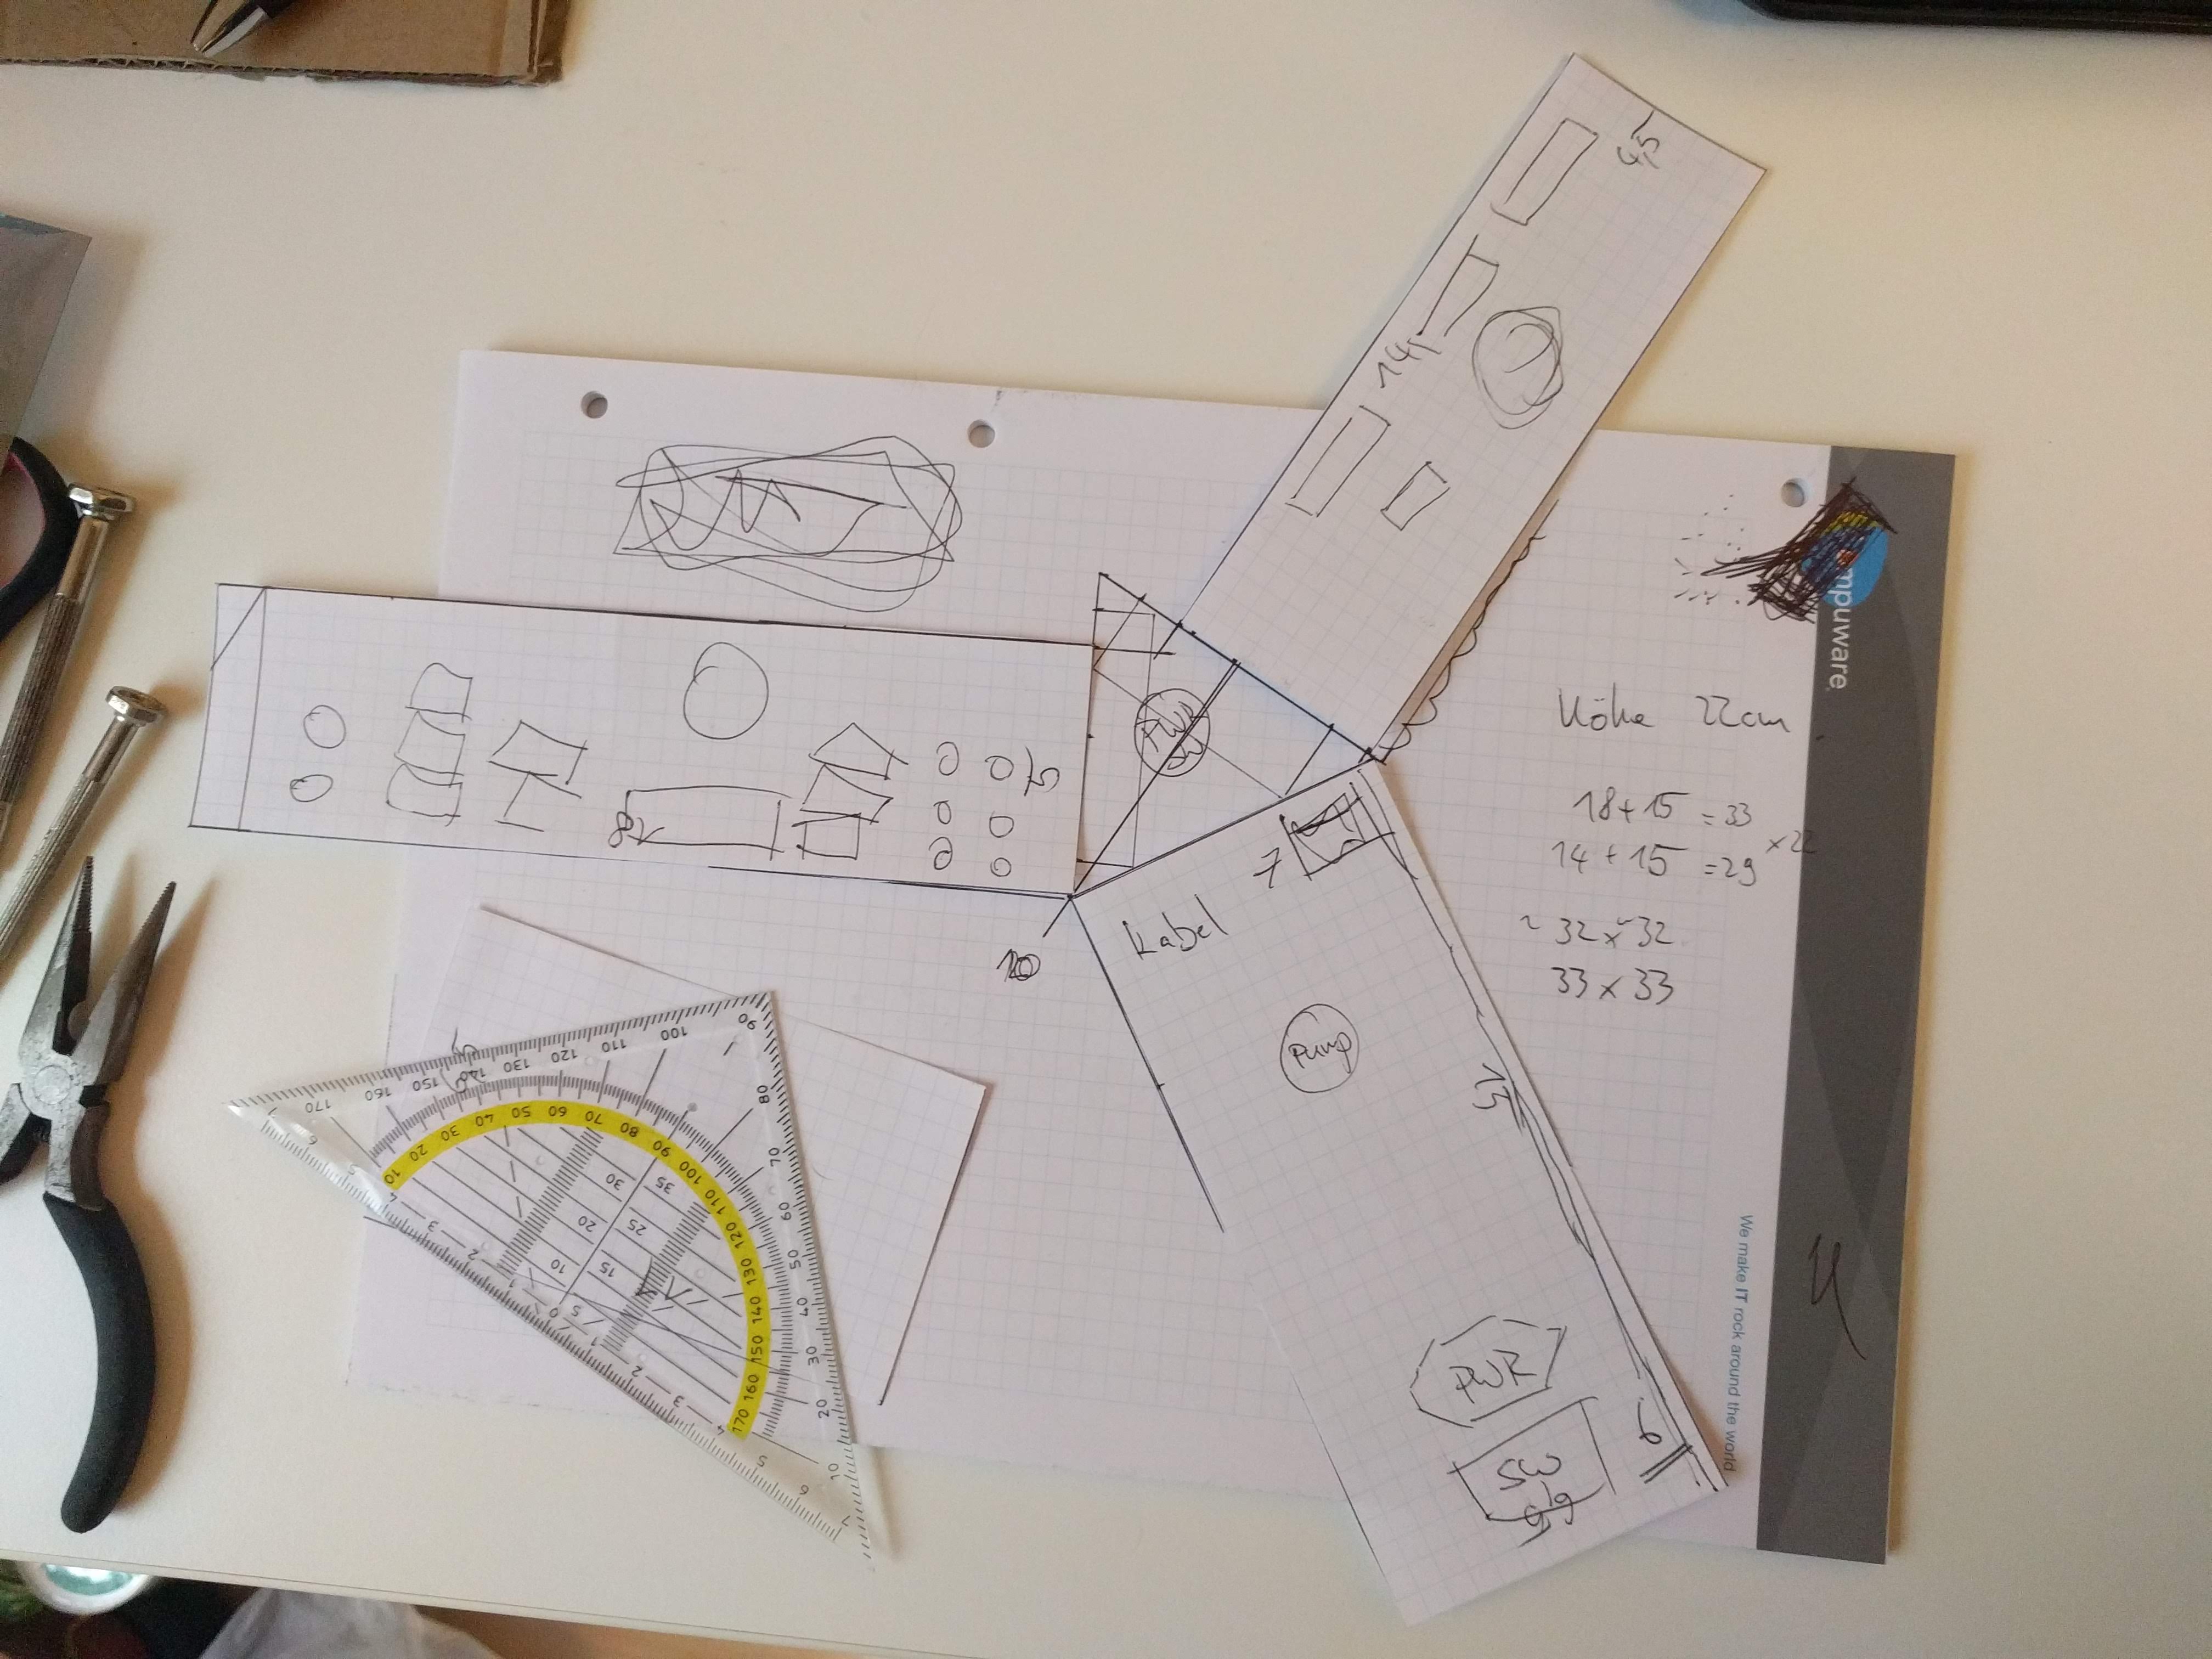
I actually sketched it up on paper first:
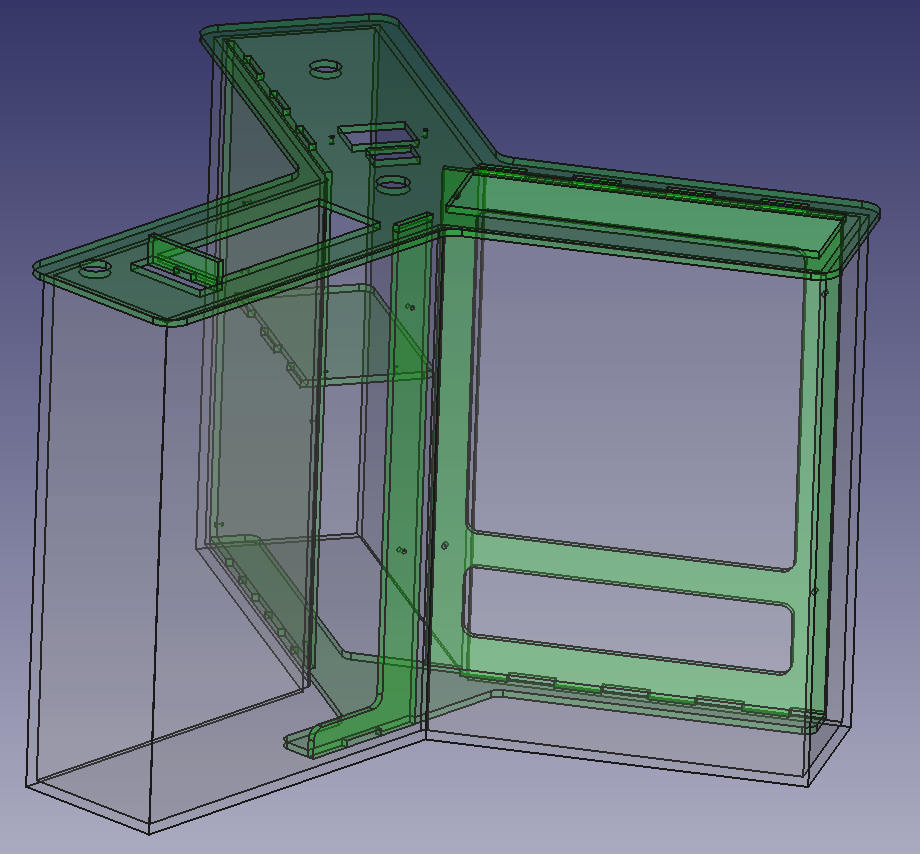
The ideas got a lot more concrete when I started modeling everything in FreeCAD, which I learned just to make this project.
Researching all the data-sheets for the different Mainboard Form-Factors, and being able to precisely apply them in CAD was really appealing to my inner engineer.
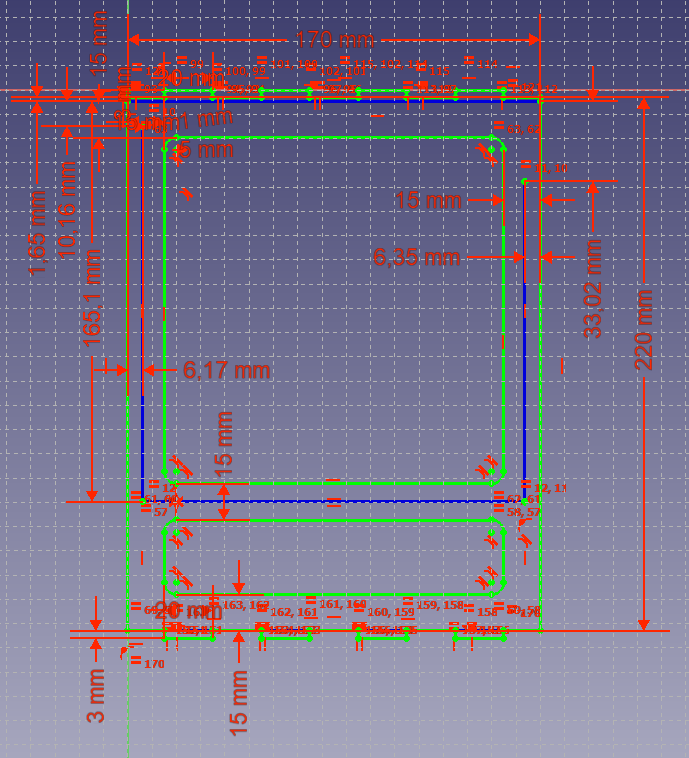
After more learning, and long nights of CAD Design, I was done:
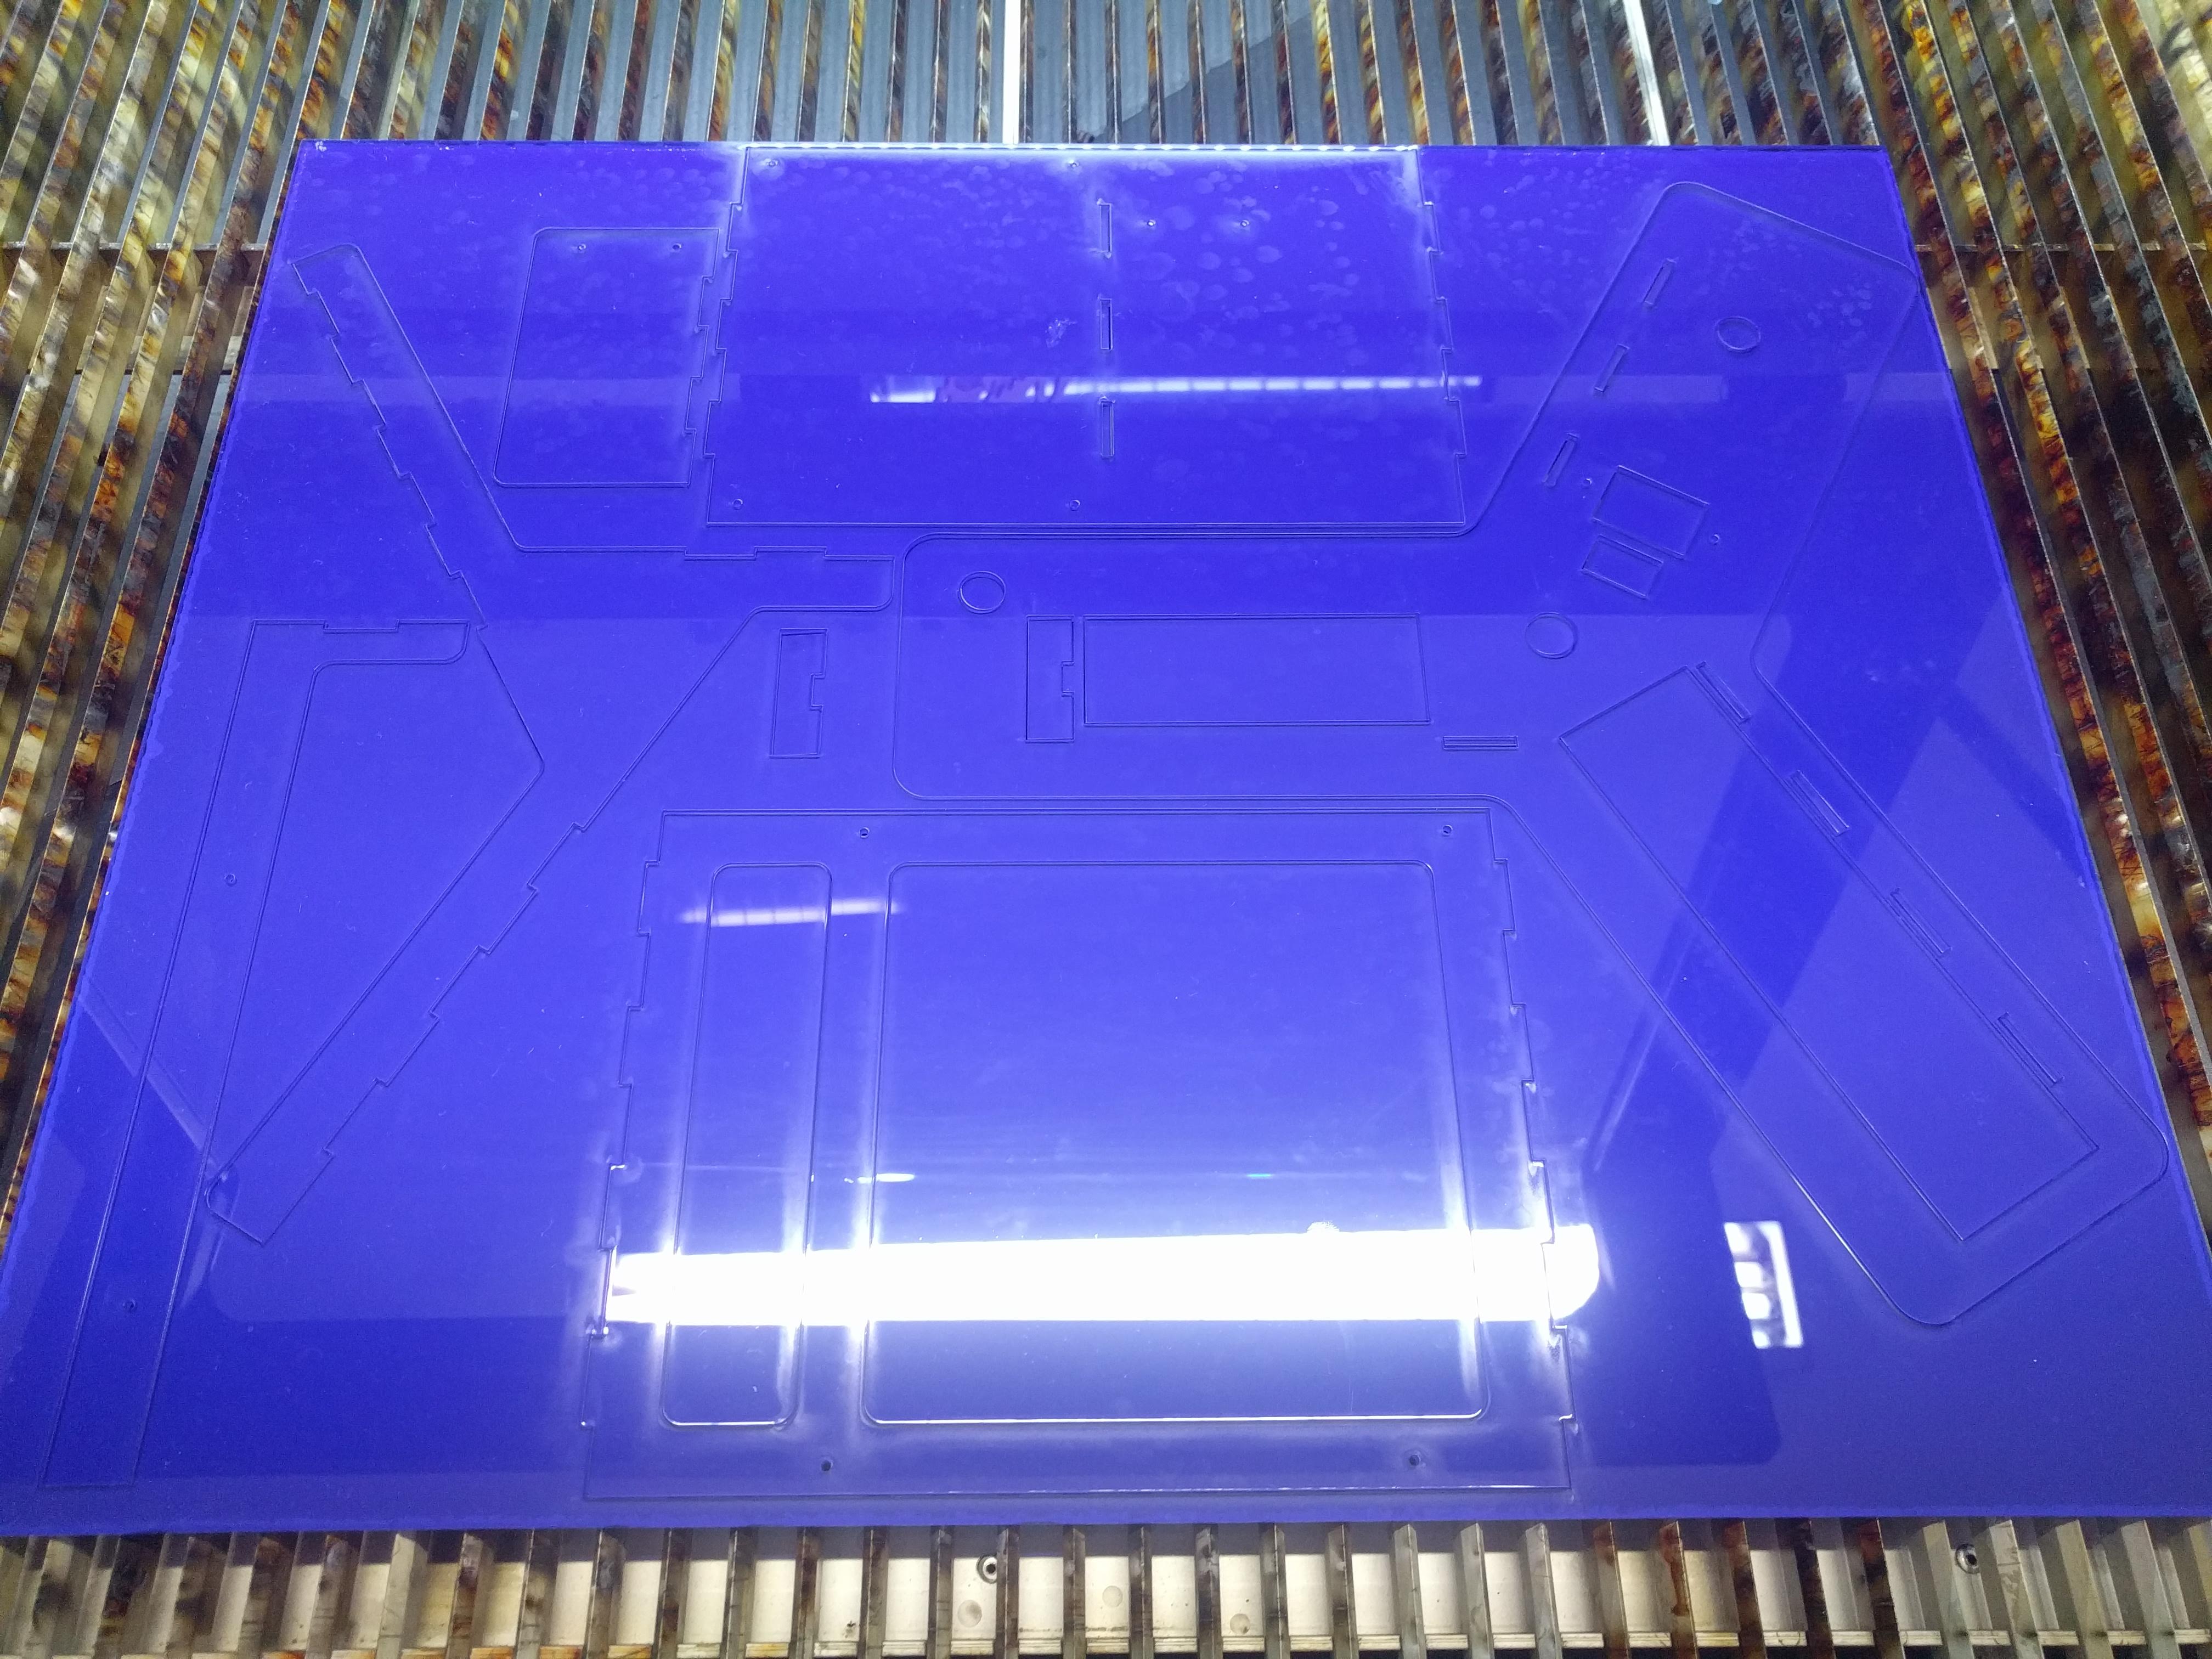
And then came the actual fabrication. I had all the parts cut out of an acrylic sheet by a laser cutter:
I then continued to glue all the pieces together. An important note here: Do not glue laser-cut edges, they will get ugly! Make sure to smooth / file them off somehow before glueing. Well, lesson learned. The next step was to assembly all the hardware into their place, which ran on air cooling for another month or so:

And then with the outer basin completed came the final assembly and pouring in the oil:

And some shaky-cam footage of the final beast running:
BTW, from planning to actually pouring in the oil was almost half a year. I started ordering hardware around December last year, and I poured in the oil around April…
# The Good
Well I wanted to do a proper case-mod for quite some time. And I can truly say that I have an absolutely unique PC! It was an amazing project to plan, design and build. I’m really proud to have pulled this off! And oh boy does it look cool!
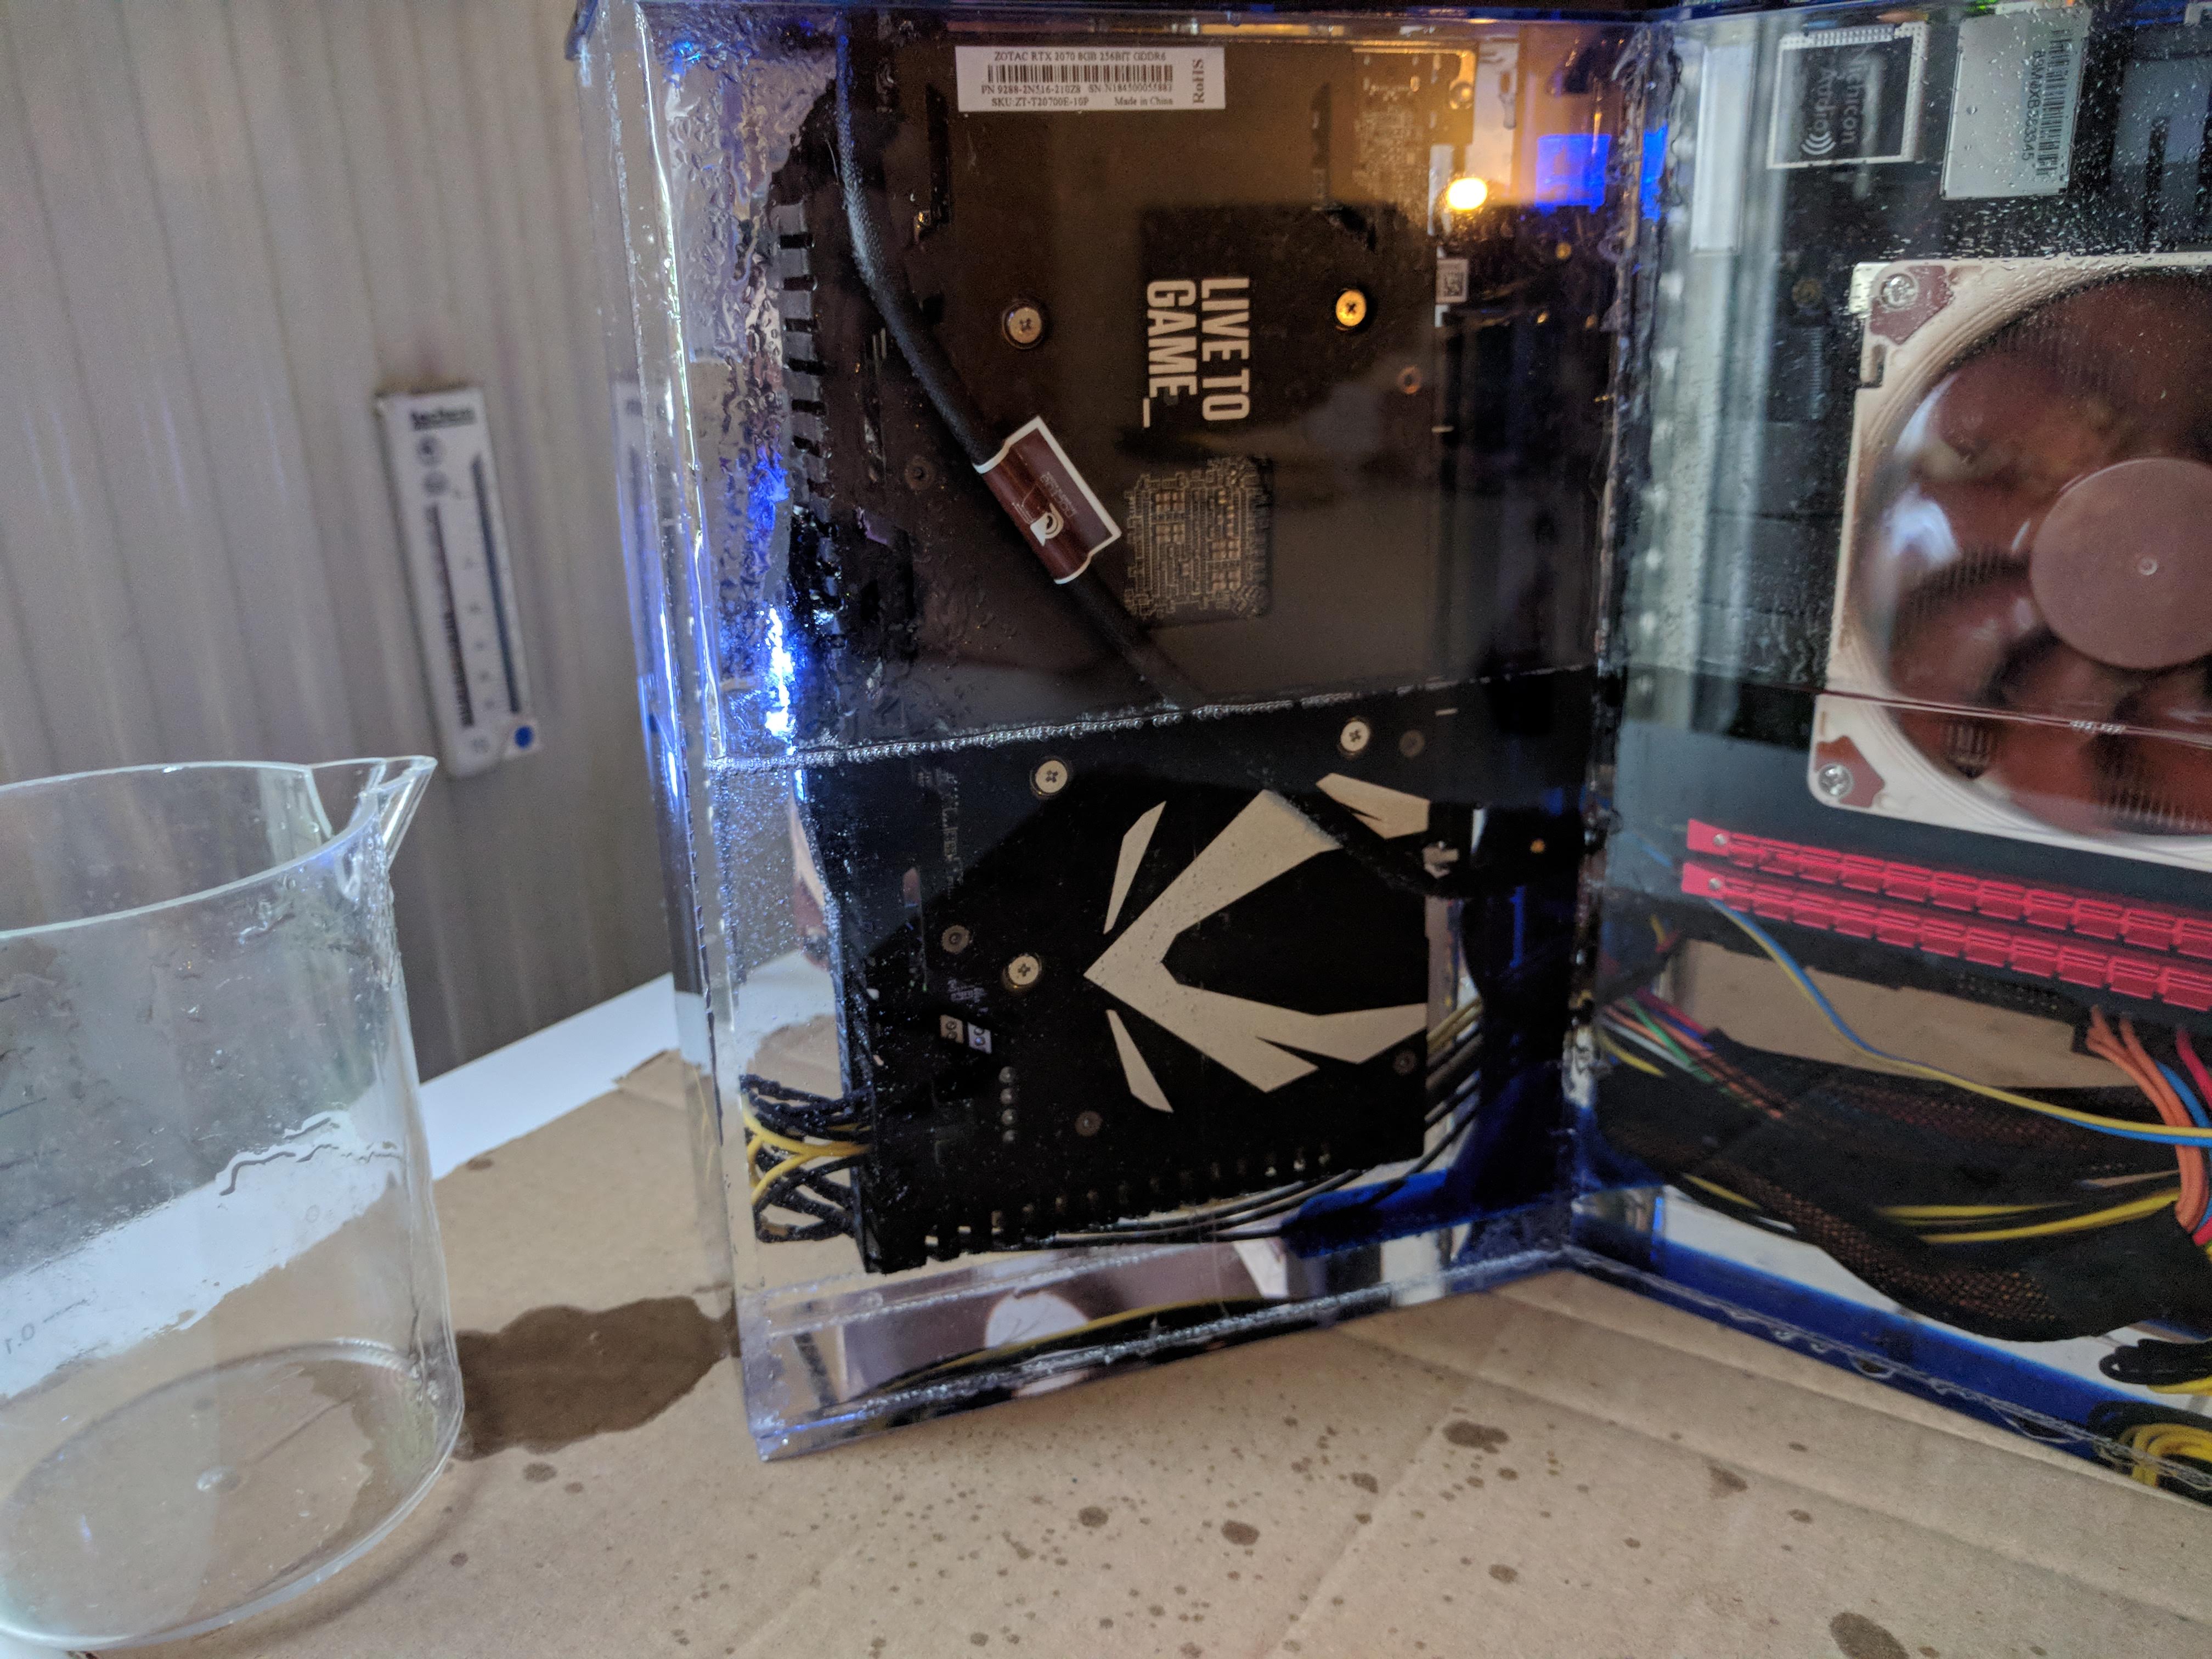
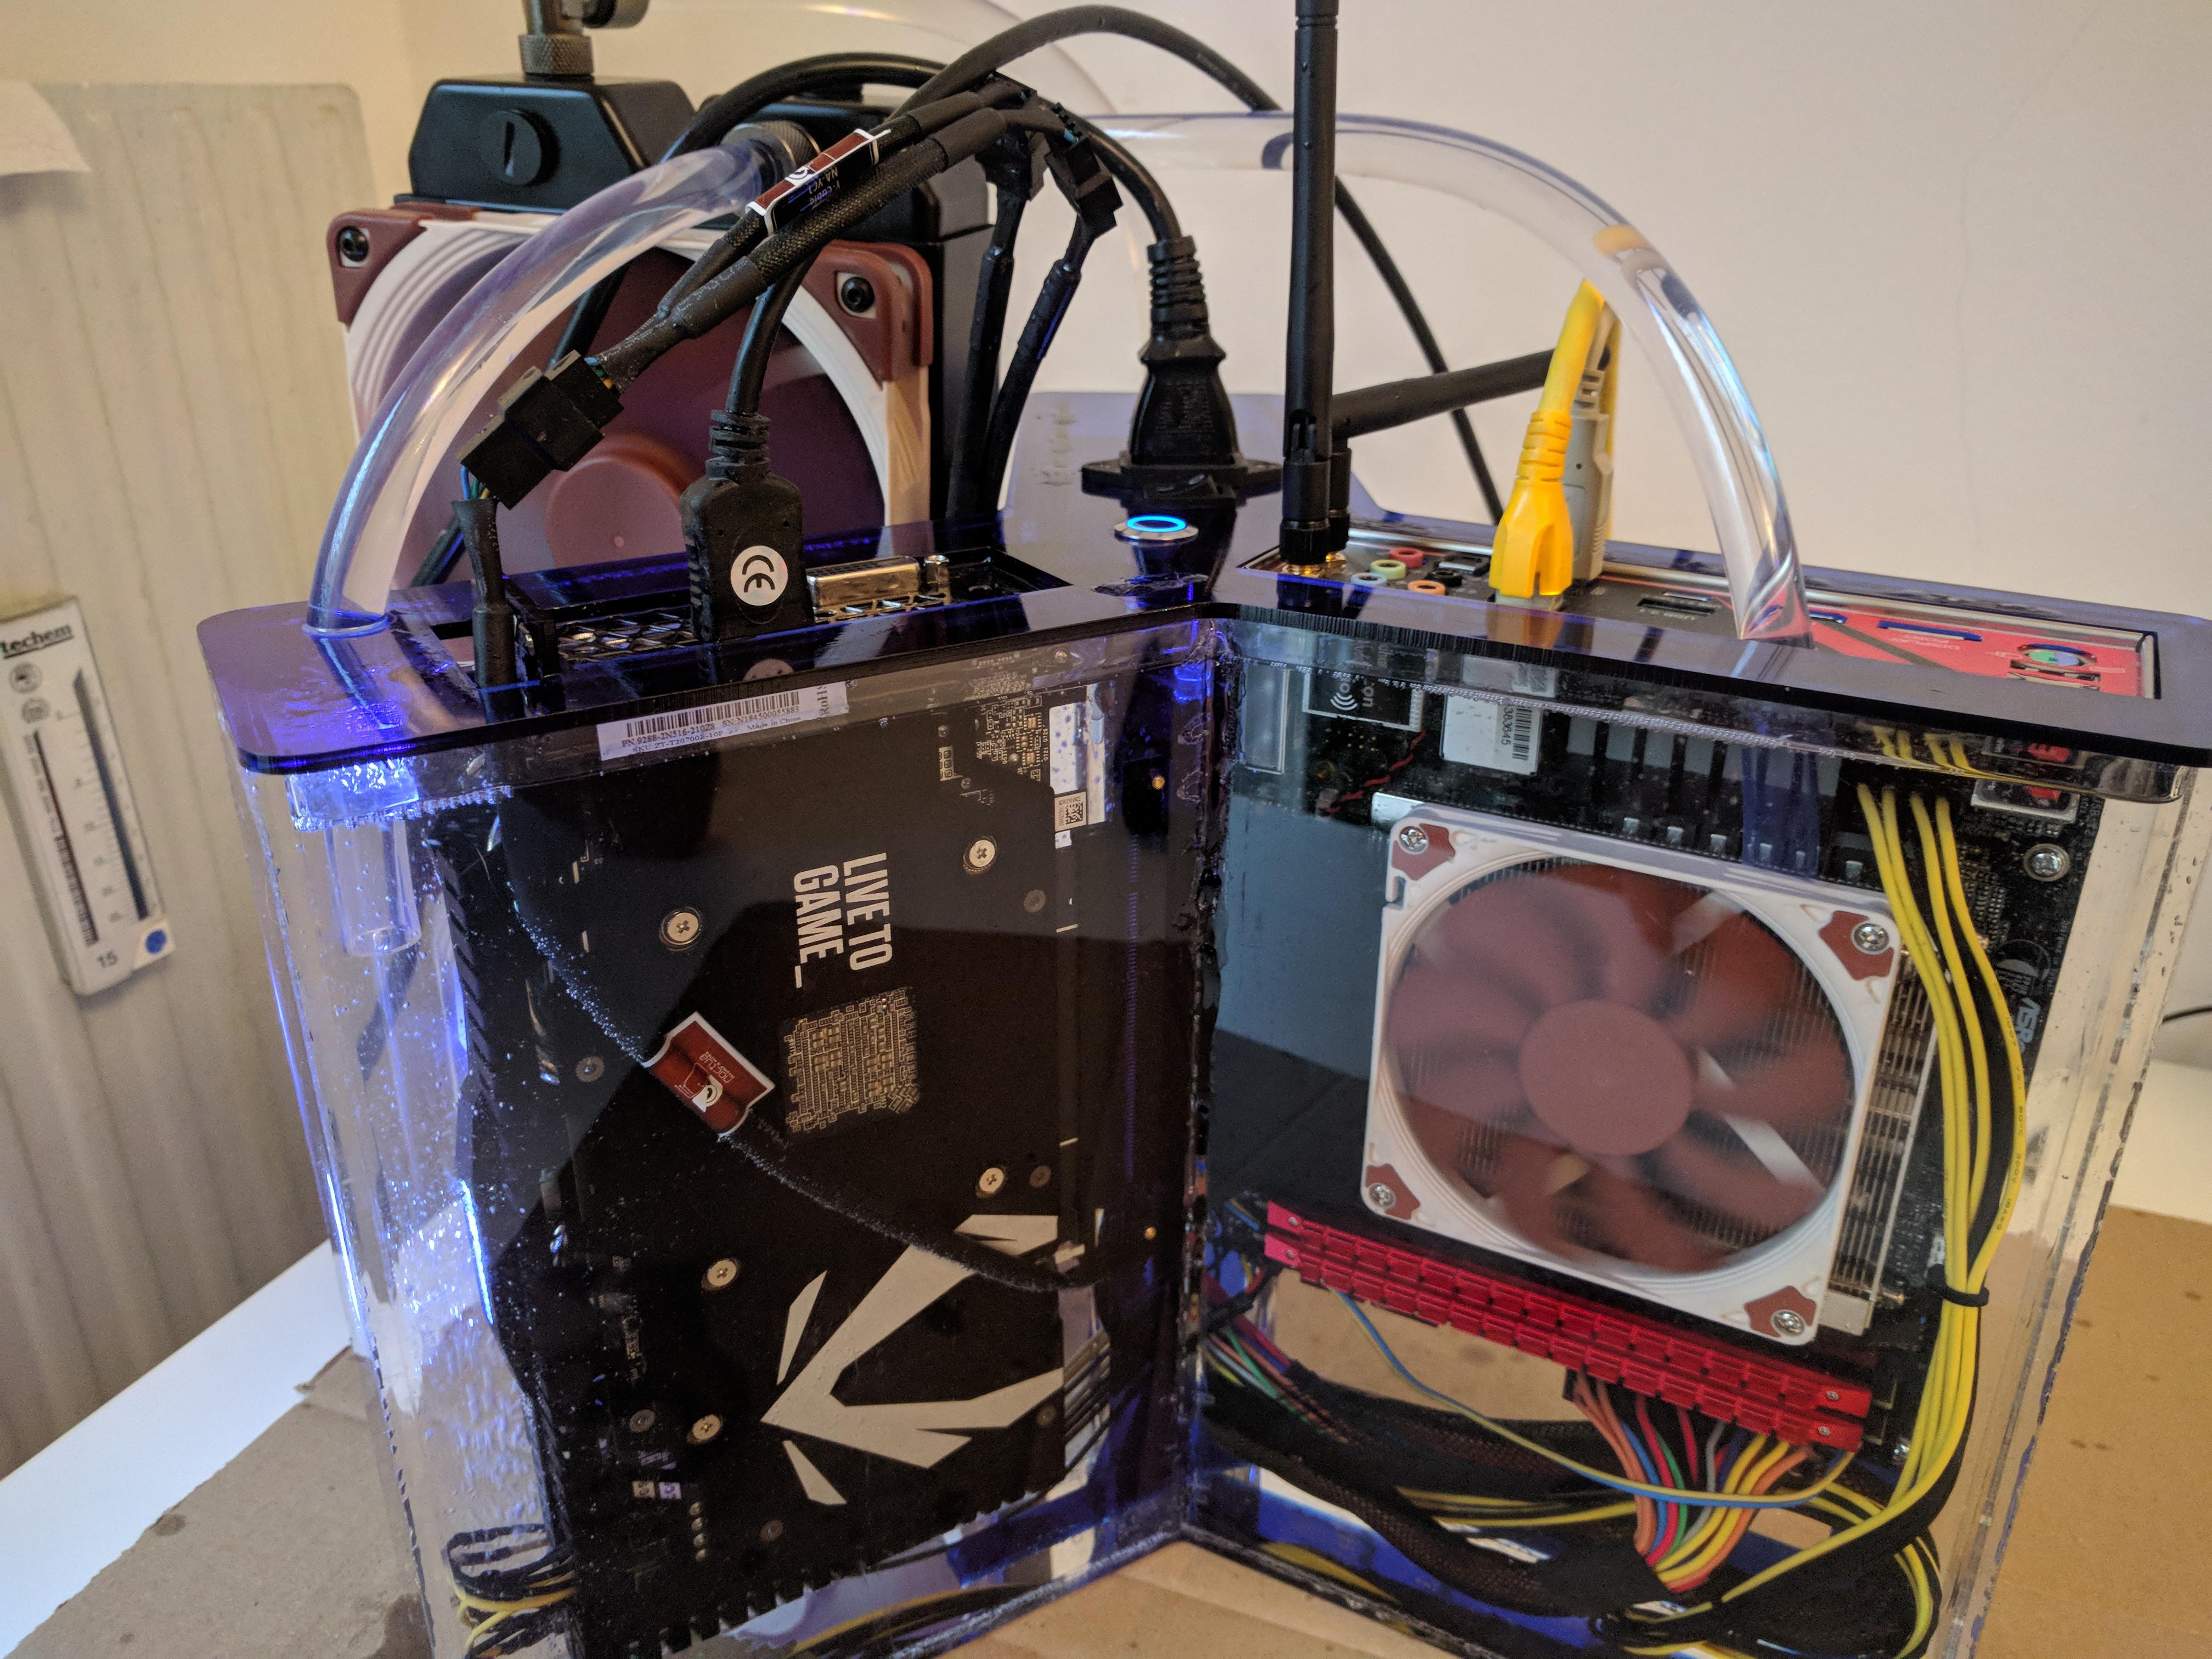
Also, the performance is great, and the cooling works. I rarely hit ~70°C on either CPU or GPU. And this Setup is running an RTX 2070 and a Ryzen 2700X, with a tiny low-profile cooler! The ambient oil temperature (as measured by chipset / SSD) does hit >40°C in summer, but things are still stable and performing well. I haven’t noticed any thermal throttling so far.
# The Bad
Although this is an amazing piece of work, it did fail some of the requirements for a PC that I have.
I it actually quite big! The radiator itself is already quite bulky, but the unique trinity-shaped design actually takes up quite some place. And it is still sitting on my desk, taking up precious space. The other bad thing is that it is not actually that quiet. You see, the pump is quite loud, and it even emits some low-frequency vibrations. I’m not quite sure if this is just the way that watercooling pumps are, or if it’s a faulty pump itself. Or maybe I made a mistake when starting it up. Apparently you have a specific procedure to prime the pump. But I have had it running dry while I was slowly pouring in the Oil. Not sure if that is the reason it is this loud now.
Also, having two separate outlets from the Radiator was probably not a good idea, since the flow is uneven. Which also reminds me that, while definitely nice to look at, the trinity-shaped design is not really that good for fluid dynamics. Especially the Mainboard compartment gets hotter than other parts of the assembly. You can even feel it when you touch the outsides.
Another thing to mention. You might not see it so well on the pictures, but I have disassembled the power supply into its own compartment as well. Which meant soldering cables and so on. Very tedious work, I don’t recommend doing it.
# The Ugly
Well… What is the worst that can happen when you are dealing with oil? Well, it leaks. And it does. Very slowly, most likely in tiny cracks of the basin. Remember, never directly glue laser-cut edges! After all, the unique shape makes it very difficult to glue, and I didn’t really do a great job at that :-( Anyway, I have the PC on a piece of cardboard to soak up the leaks which I had to change once so far.
Also, this is something that I have read already somewhere, but it is still very surprising because it kind-of defies the laws of gravity. You see, oil can actually flow upward inside of cables! Incredible. But the oil actually travels upwards in one of the USB cables and drips under my table. Haha!
The problem is, the RTX 2070 Mini that I have has a fan which is quite close to the PCI bracket, so when angled upside-down, this means I have to fill the oil quite near the top for the fan not to splash it. That means that all USB and other connectors on the Mainboard are also soaked in oil, which gets on all the cables you plug in. Not nice :-(
# Future ideas
Well this was basically it. It was an amazing project to build, and I learned a tremendous amount doing it.
Am I done though? I’m not quite sure. I do have the slight urge to re-do the project at some point. To correct all the mistakes that I made and learned from.
- Go with a more usual rectangular design, without the need for a riser card.
- At least for the outer basin, have someone else assemble/glue it who knows their job. Using a rectangular shape should make that a lot easier anyway!
- Do not disassemble and mess with the power supply, just get an SFX PSU with cable management and some nicely sleeved cables. Even doing the cable-sleeving yourself can’t be as tedious as soldering cables :-D
- Get a GPU that has more space between bracket and fan, so I don’t have to fill the oil quite to the top.
- Better optimize for fluid dynamics. Hot fluid rises to the top, which means that somewhere on the top should be an outlet that leads to the radiator, and from there an inlet on the bottom somewhere.
- Not sure why this is currently so bad, but make sure to get a quiet pump.
- Make sure to design the inner part to be more easily accessible / removable.
I do have some ideas revolving around a dual-basin design. One basin with the hardware, which overflows like a waterfall into a second basin at the bottom. This should in itself already cool the oil down a bit. From there, through the radiator and into the bottom of the inner tank. This would however necessitate a directional flow valve. And as I have learned that oil is quite fleeting, I’m not sure this is possible? Well it has to somehow!